Our orchard is now relatively safe from deer behind a 3-wire electric deer fence we bought from McGregor Deer Fence Co.
Portions of the job went much faster than I expected, and a couple of portions took longer. You can read about the whole process on the Farm Log, but it’s interspersed there with other things that are going on here at Longleaf Breeze, so here’s the summary of just the deer fence work.
As soon as Amanda and I began working to mold Longleaf Breeze into a working subsistence farm, we learned two painful lessons. The first was that our sandy soil is extremely prone to erosion; the second was that the woods are full of desperately hungry deer. So from the first conversation we had about the orchard, we knew we would need to include in our plans some kind of protection from the deer.
Your orchard may not be so vulnerable. After free-standing trees reach mature height, say 25 feet, for example, they’re relatively invulnerable to deer damage, because most of their foliage and fruit are beyond the reach of the deer. So you may be able to solve your deer problem simply by using hog wire cages while the trees are young. In our case, however, having decided as we have to trellis nearly all our fruit trees, we know we will be keeping all the foliage and all the fruit right down close to the ground where the deer can reach it easily.
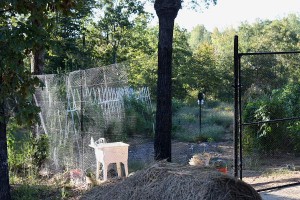 We used a barrier fence around Veg Hill, an imposing 7-foot metal hexagrid sweetheart from McGregor that truly has allowed us to stop worrying about deer damage on Veg Hill. We certainly have plenty of pests, but deer are not among them. We briefly considered a metal hexagrid fence around the orchard but rejected it for several reasons:
- The perimeter of the orchard is about twice as long as the perimeter of Veg Hill.
- We couldn’t justify the time needed to install hexagrid.
- We couldn’t justify the money needed.
- The metal hexagrid fence obstructs visibility very little, but you can see it, especially when you’re close to it. Having made the decision to use the orchard as part of our visual presentation, we wanted to do whatever we could to make it visible from the lodge and the barn.
The solution on which we settled is a 3-wire electric fence, also from McGregor. Here’s their description of the 3-wire electric fence. The key components are a charger (in our case the Magnum 12 Solar-Pak) that delivers the current, a polywire electric fence line at 36 inches high, a polywire fence line three feet inside the first line with wires at 21 and 48 inches high, respectively, and a ground rod to complete the circuit. I’ll let you in on a little secret if you promise not to share it with our deer: any self-respecting deer could vault our electric fence in a heartbeat and feast on the treasures we hope one day to have in our orchard. What keeps her from doing so is her poor depth perception: she can’t tell how far that second line is away from the first without being there first.
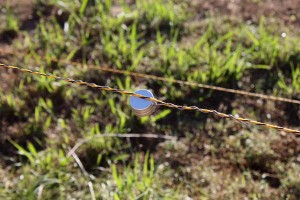
The three polywires of the electric fence all carry a positive charge. In my case I opted to thread one continuous line that runs the fence line, doubles back and runs the fence line again, and then doubles back and runs the fence line a third time. That allows me to hook only one of the three lines directly to the charger and know that I am getting a good connection. Our fence is a “baited” fence, meaning that the outside line is adorned in many places with downward-facing metal caps wired into the fence line. Inside each metal cap is a cotton ball soaked with a few drops of “apple essence.” It smells delightful, so I can see why the deer find it so appealing. When the deer sticks out her nose or tongue to investigate this wonderful smell, she gets a shock. Our hope is that one shock for one deer is enough to persuade all her friends this is not a pleasant place to be. If she looks beyond the scent cap to the orchard, we hope she then sees the second line in the distance (but doesn’t know how far away) and decides to wander off looking for more accessible food.
If you’re a city dweller and haven’t yet dealt with deer damage, you may be wondering how I could bring myself to inflict such pain on one of God’s loveliest creatures. If so, know that I would have asked the same question five years ago. That is, I would have asked it before I saw our sweet potato leaves eaten to the nub, our tomatoes decimated, and our collards destroyed. I now know that there are WAY too many deer in the forest because we’ve killed all their predators, and they get desperately hungry in the fall. I am so over the Bambi syndrome. You would be too if you saw the damage they can wreak.
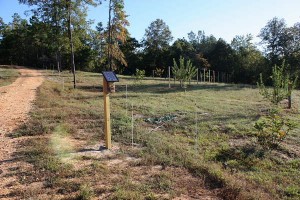 My installation work started with mounting the charger. The reason I decided to do this first is that Parmak recommends that the charger be left outside in the sunshine with the power off for at least five days before energizing the fence. I used Tractor’s auger to dig two holes, one for the charger and one for the 6-foot copper grounding rod McGregor includes with the kit. Because the grounding rod was farther away from the driveway, I sank it first. The auger took care of the first 3 1/2 feet; all I needed to do was to drive the copper rod the remaining 2 1/2 feet, which turned out to be simple with my sledge hammer. I will digress and say that I agonized for days about driving that ground rod but found the actual process to be simple and quick. It’s one of the tasks that went faster than I was expecting.
To ensure a good connection between the ground rod and the earth, I poured a 5-gallon bucket of water into the hole containing the ground rod before I filled in the dirt around it, leaving about 7 inches of the rod protruding from the ground. Next I set in concrete a treated pine 4 x 4 x 8 (purchased from Tallassee True Value, of course). After letting it set overnight, I attached the charger to it. The charger simply hangs on two screws – couldn’t be simpler to mount. With the charger in place I was ready to work on the fence itself.
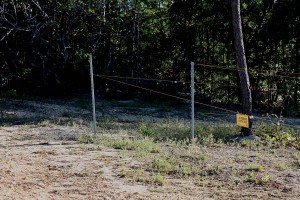 I drove in two t-posts (one for the outside line and the other for the inside line) at each turning point along the line. I had ordered from McGregor a 990-foot kit plus fittings for a gate. It came with enough t-posts for 4 corners, but our irregularly shaped orchard has eight corners, so I needed to supplement the t-posts with several of my own, and I needed to order additional corner insulators. McGregor suggests driving the t-posts in with a hammer. You’re welcome to do that if you wish, but one of the smartest purchases we made years ago was a t-post driver, and that’s what I used.
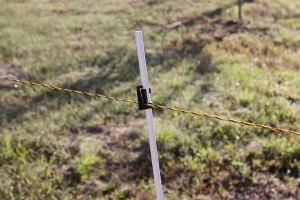 With the t-posts in place, the next step was to fill in the space between t-posts with fiberglass posts spaced no more than 40 feet apart. I wore work gloves to handle them, because I read a warning on the Internet (but interestingly, no warning from McGregor) that the fiberglass fibers can embed themselves in your skin. Each fiberglass post needs as many clips attached to it as there are lines it will support, so each of the fiberglass posts on the outside line got one clip, and each post on the inside got two clips. I faced all the clips so that they supported the line on the outside of the post, but I’m not sure it matters. I attached the clips (sometimes requiring a little elbow grease) before driving each post.
McGregor shipped two lengths of fiberglass posts, a shorter length for the outside line (only one run of polywire at 36 inches off the ground) and a longer length for the inside line (two runs of polywire at 21 inches and 48 inches). I ran out of the shorter length of the fiberglass but had more than enough of the longer length, so I used a few of them on the inside line. I didn’t bother cutting them off, but I’m sure I could have if I had wanted to. To drive in the fiberglass posts I placed a square block of wood on the post and hit it with my hammer. I had no trouble driving in the fiberglass posts and ended up driving several of them in the ground too far. If I had any trouble, I immediately knew I had hit a root or a big rock (both always plentiful at Longleaf Breeze), and I just moved the fiberglass a few inches down the line and tried again. With the t-posts and fiberglass posts in place, I was ready now to thread polywire.
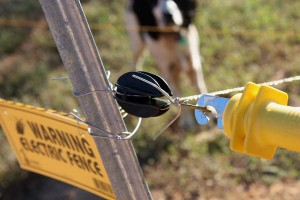 It took me some noodling and an embarrassing phone call to McGregor to figure out how to use the insulators that connect the fence line to the t-posts. You use both channels of each insulator, one channel for the fence line polywire and the other for a length of galvanized metal wire that connects the insulator to the t-post. That’s why they call them insulators, Lee! The purpose of the insulators, of course, is to avoid any contact between the polywire and the ground, reserving that for the deer we want to shock. Any contact between the polywire and the ground other than through the deer’s body – even through weeds – will reduce the voltage of the shock the deer receives.
I tied off the polywire at the t-post just to the right of the gate and began threading it through the insulators and the fiberglass posts. I threaded the polywire around the insulator, then inserted in the other channel of the insulator a 12″ length of thin galvanized wire (also supplied by McGregor) bent into a “U.” I twisted the ends of the wire around each other, and then around the t-posts at the proper height. Threading the polywire through the little plastic clips on the fiberglass posts could not have been easier. The line just slides through a narrow opening at the top of the clip and then rides gently in the clip itself. McGregor supplied plastic crank-reels with the polywire and instructed me wind the polywire onto the reel before installing it. I found that unnecessary; it was far easier to just wind it off the reel on which it came, allowing it to spin on the index fingers of each hand. I started on the lower inside line and made a complete circle around the fenceline (leaving room for the gate). Then I bridged over to the upper inside line and doubled back to run the length of the fenceline back to the starting point. By this time I had run through one reel of polywire and used one of the split-bolt clamps McGregor supplied to splice on the next reel and continue. Then I bridged over to the outside line and made a third circuit around. I made it almost to the end of this third pass before using up the second reel of polywire but had to use the third reel for the last few feet. I tied it off at the gatepost, and my polywire runs were complete.
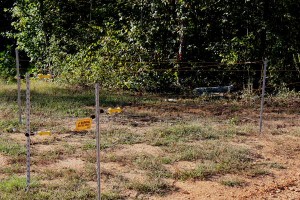 Next I started on the gate. I initially measured out a 12 foot gate but then decided to allow a little more room for Tractor to pass through. I ended up with a 15-foot gate. Jonathon at McGregor says there’s some chance this will be too wide and that the polywire will deteriorate over time; if it does I can replace the polywire easily enough. Let’s be clear about what “gate” means. This is not a metal or rigid gate; it’s simply three strands of polywire at the same height and spacing of the fenceline, but attached at hooks (look closely at the photo and you’ll see three yellow plastic handles) so they can be opened easily. The key with the gate is to make sure to complete the electrical connection between the remainder of the fenceline and the polywire strands that form the gate, yet NOT allow any connection between those strands and the t-posts to which they hook. I missed that second part at first. It took the eagle eyes of Johnny at McGregor on a video I sent him to catch my error. To ensure the connection between the fenceline and the gate strands, I bridged the gap between them with hookup wire and two split-bolt clamps for each line.
With all the wires connected, I used six of the tensioners McGregor supplied to tighten up the line. It doesn’t need to be piano-wire tight, just straight enough not to sag into the weeds.
With all the wires in place, I was ready to connect the charger. With the charger turned off, of course, I stripped insulation off an inch or so of the hookup wire and connected it to the positive (red) terminal of the charger. I connected the other end of the hookup wire to the closest run of polywire with a split bolt clamp. I initially connected the hookup wire to all three polywire runs (with the hookup wire stretched across the gap between the inside and outside lines), but Jonathon at McGregor pointed out that the circuit is complete as long as I connect one of the three, so now the connection is simpler and neater.
McGregor supplies a ground rod clamp with the kit. I used some of the hookup wire McGregor supplied to run from the ground rod clamp back under ground (to make weeding easier later) and along a trench to the post on which the charger is mounted. The hookup wire runs up the post to the negative terminal of the charger.
I must digress here and tell you that Amanda and I have been deeply concerned about traumatizing Oddie, our 43-pound springer spaniel, by letting him get zapped by the deer fence. I held off 2-3 days energizing the fence for the first time so Tom Bray, our electrical engineer friend and guru of all things electronic, could bring over a couple of 10 ohm resistors. We first used one connected across the two terminals (10 ohms of resistance). No shock. Oddie walked right under the fence so that it rubbed his back and showed no reaction. Then we connected two resistors in series (5 ohms of resistance, leaving a stronger current). Still no shock. Then I started testing with the 5-light testers McGregor sent me and found my voltage to be very low.
Suffice it to say that thus began a three-week journey through multiple conversations with McGregor and Parmak during which we slowly improved my ability to test voltage and solve the problems one by one. Through it all I gained the greatest respect for the customer service and knowledge of the staff at McGregor Fence Co. I now know that I wired the fence wrong, neglecting to isolate the positively charged polywire line from the grounded fencepost. Now that I have done that (and meticulously removed the weeds from the fenceline), we are getting a reliable 2500 volts at all points on the fence. I can say that with confidence because – thanks to Parmak – I now own a nice, easy-to-read analog fence testing voltmeter. So much easier to use than the Dare 5-light tester McGregor sent me.
In the process, I was surprised to discover that the charger does not deliver a steady current. It actually delivers a pulse of current every 1.3 seconds. So there’s a theoretical possibility that a deer could touch the fence line briefly between pulses and receive no shock. I say theoretical because the scent caps are engaging enough that the contact is almost always longer. Once every 1.3 seconds is probably just fine.
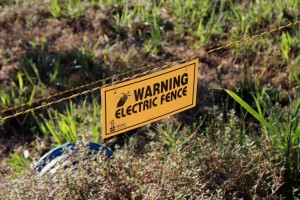 This weekend I moved a couple of t-posts to allow room for my mower. I attached the scent caps – twisting their wires around the polywire to ensure a good electrical connection – and dribbled apple essence into them. I finished by attaching the warning signs to the fence; I placed most of the signs where I thought new visitors might be approaching the fence.
Now that the fence is complete, it would be easy for me to assume the deer problem is solved and to relax. I can’t do that. If our fence is to continue being effective, I need to keep the fence line mown so that the weeds won’t grow up and touch the fence line. As soon as they start to make a connection between the fence line and the ground, the voltage of the shock drops. Others solve this problem by applying glyphosate (Roundup) to the fence line. We have no interest in doing that, so we’ll be mowing.
wow. great articles! nice
Pingback: Podcast #121 – Critters in the Garden « Longleaf Breeze
Pingback: Podcast #122 – A Culture of Poison « Longleaf Breeze